The custom forms feature allows you to create custom forms to collect any data you want.
When you get your web site, you will find we have created sample custom forms for you that you can use, edit or delete if you do not need them.
To see these forms go to www.[yourwebsite.com]/forms.php.
To access them from your back office, go to “Customize Web Site” > “Create Custom Forms”. From here you can access the existing forms or create a new one.
To create a new form:
- You must create each field separately, then click “Click to Add/Save Field”
- When you complete doing this,
– Put a redirect page (optional)
– Add image verification (optional) - You must click “Click Here to Create/Update Form“

How to put your forms online
A new form tag will be created, e.g. [myform].

Your form will be displayed wherever you put your form tag, e.g. [newform].
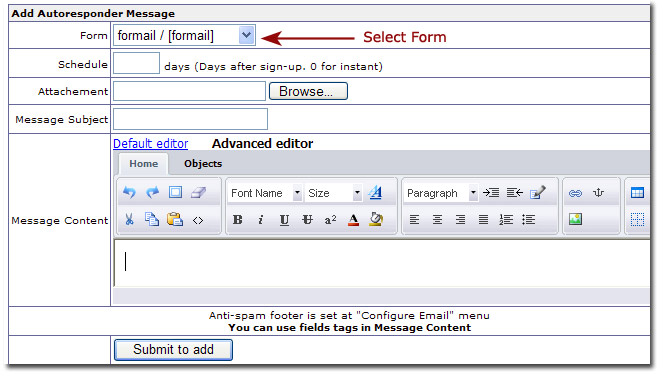
How to add Autoresponder Messages
To create a new autoresponder message, select the Form you want to create a message for, schedule the days, enter message and save.
Some Scenarios
-
You create a landing page for a marketing campaign, create a form and put it on the page to collect your leads
- You prefer your form to the ones we give you on the web site by default
- You run a different service on the side, and want to integrate it into your web site
Example:
Say you run a mortgage business on the side and you want to attract mortgage leads to your web site.
- Create a new sales page from “Customize Web Sites” > “Create Additional Page”
- Add the relevant content (and form tag) from “Customize Web Sites” > “Customize Pages”
- Create fully personalized follow-up autoresponder marketing messages to convert your leads into business
Of course these are only examples; you have no limitations!